Understanding the Basics of Northern Lights Photography
Capturing stunning photographs of the Northern Lights, also known as Aurora Borealis, requires an understanding of several fundamental factors. Firstly, the natural light conditions play a pivotal role in achieving the desired results. The Northern Lights are best photographed in darkness, so timing is critical. Ideally, you want to be shooting during periods of low light, which typically occurs from late autumn to early spring, around midnight when the auroras are most active.
Weather conditions are another essential aspect of Northern Lights photography. Ideal conditions include clear skies with minimal light pollution, as cloud cover can obscure the view of the auroras. Areas that are away from city lights, ideally in remote or rural locations, are preferred. Check weather forecasts, and aim for nights that promise low humidity and high visibility to improve your chances of witnessing and photographing the magnificent light show.
To enhance your photography experience, it is beneficial to understand how auroras are formed. These natural light displays occur when charged particles from the sun collide with gases in Earth’s atmosphere, producing vibrant colors. Knowing this phenomenon can help you anticipate the best times for viewing, as solar activity often peaks in cycles.
Scouting locations is vital for maximising your chances of capturing the Northern Lights. Researching geographic areas known for frequent auroral activity, such as Norway, Finland, or Alaska, can be invaluable. Local resources or aurora forecasts can also guide you to optimal viewing spots. Furthermore, consider the landscape around your chosen location; foreground elements, such as mountains or trees, can add depth and interest to your compositions.
Essential Gear for Capturing the Northern Lights
For beginners looking to capture the breathtaking beauty of the Northern Lights, selecting the right photography gear is crucial. The primary tool is the camera, where the choice between a DSLR and a mirrorless camera will largely depend on personal preference and ease of use. DSLRs are known for their robust performance in low-light conditions, while mirrorless cameras are generally lighter and more compact, making them easier to handle during long night shoots.
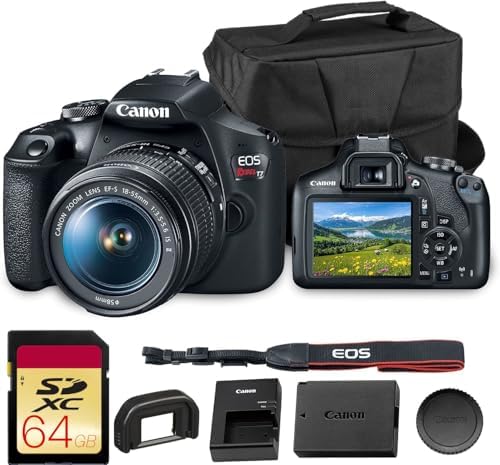
- Items Included: Canon EOS Rebel T7 DSLR Camera with 18-55mm Lens, Canon LP-E10 Battery (860mAh), Canon LC-E10 Battery Ch…
- Exceptional Image Quality for All Levels: Capture stunning, true-to-life photos with the Canon EOS Rebel T7’s 24.1MP APS…
- Seamless Sharing with Built-In Wi-Fi & NFC: Enjoy effortless connectivity with the Rebel T7’s built-in Wi-Fi and NFC fun…

- 24.1 Megapixel CMOS (APS-C) sensor with is 100–6400 (H: 12800)
- Built-in Wi-Fi and NFC technology
- 9-Point AF system and AI Servo AF

- High-Quality Imaging: The Canon EOS Rebel T7 DSLR Camera features a 24.1 Megapixel CMOS sensor for stunningly detailed p…
- Versatile ISO Range: With an ISO range of 100 to 6400 (expandable to 12800), the Canon EOS Rebel T7 captures clear image…
- Fast Autofocus System: Equipped with a 9-point AF system and AI Servo AF, the Canon EOS Rebel T7 ensures precise focus f…
Another vital component of your photography setup is the lens. A wide-angle lens is essential for photographing the Northern Lights as it allows you to capture a larger portion of the sky and the dramatic landscape below. Typically, a lens with an aperture of f/2.8 or wider is recommended, as this will enable more light to enter, resulting in clearer images of the auroras.

- 【Fast Autofocus Performance】 Powered by a viltrox stm silent motor, the e-mount full-frame lens delivers fast, accurate,…
- 【Full Frame 20mm Ultra-Wide Angle】 The viltrox 20mm f2.8 e-mount wide angle lens offers a 91.6° ultra-wide view with a b…
- 【Compact Lightweight 157g】 Weighing only 157g, this viltrox 20mm lens is ultra-compact and pocket-friendly, built for ef…
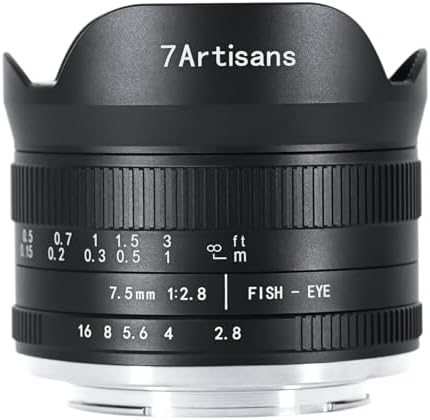
- 【190°Views Super Wide -Angle】:7artisans 7.5mm F2.8 The second generation adopts 9 groups of 11 optical structures, and t…
- 【F2.8 Large Aperture】:Under the same ISO of the aperture, you can achieve more inlet volume to shorten the exposure time…
- 【7.5mm F2.8 II】:The new Hoya lenses are used, and two ED lenses are added to effectively improve the effects of color di…
In addition to the camera and lens, a sturdy tripod is imperative. The low-light conditions necessitate longer shutter speeds, which means any movement can blur the images. A reliable tripod will provide stability, allowing for sharp, high-quality shots despite the extended exposure times required to capture the Northern Lights.

- 【Introducing NEEWER BASICS】 Simple and practical, NEEWER BASICS is an economical product line that focuses on essential …
- 【Superior Stability Compact Travel Tripod】 Made of aluminum alloy and plastic, the TP12 heavy duty camera and cellphone …
- 【Arca Type Dual Compatibility QR System】 The versatile Arca type QR plate and clamp base are also compatible with PD bac…

- Adjustable 20″–74″ Height: Easily extend from tabletop to full height for portraits, vlogs, outdoor photography, travel …
- Heavy Duty & Stable: Durable aluminum legs support up to 8.8 lbs, so it can take DSLRs, mirrorless cameras, ring lights,…
- Multi-Device Compatibility: Includes quick release plate & phone mount — switch effortlessly between camera and phone se…
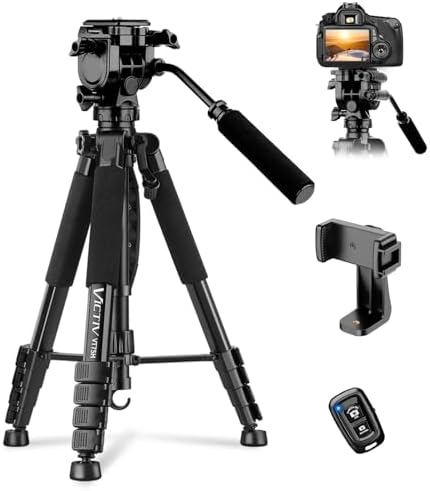
- 【75 Inch Tall Tripod Stand】 This tall camera tripod has a height adjustment range of 21.65-75 inches. It can meet the ne…
- 【Tripod for All Camera and Phone】Standard 1/4″ screw mount compatible with all cameras ( Canon, Nikon, Fujifilm, Olympus…
- 【Professional Fluid Head Tripod】Professional camera tripod stand is equipped with a stable and smooth fluid head, it all…
Using a remote shutter release is also advisable. This device prevents camera shake that can occur with manual shutter activation, ensuring that your photos remain crisp and in focus. Finally, photographic filters can be a valuable addition to help manage light pollution or enhance specific colors in your composition, further improving the quality of your photographs.

- CONVENIENT AND EASY HANDS-FREE SHUTTER CONTROL FOR MOBILE DEVICES: Perfect for taking selfies and steady tripod shots.【U…
- SMALL ENOUGH TO KEEP ON A KEYCHAIN OR IN YOUR POCKET: The remote is very small and lightweight, so it is convenient to c…
- OPERATIONAL UP TO 30 FEET (10M): Take photos even when at a distance from your device

- CAPTURE STUNNING PHOTOS & VIDEOS REMOTELY WITH EASE – Say goodbye to blurry photos. Eliminate camera shake for razor cri…
- PAIRS INSTANTLY. NEVER MISS ANOTHER PHOTO MOMENT – Auto-connects to your phone in split-seconds. Blue indicator light le…
- RELIABILITY AND CONVENIENCE BUILT TO LAST – Xenvo Shutterbugs are equipped with advanced American, Ericsson Bluetooth 3….
By investing in this essential gear, beginners can significantly enhance their chances of capturing stunning images of the Northern Lights.
Settings and Techniques for Optimal Shots
Capturing the northern lights can be a magical experience, but it also requires a solid understanding of your camera settings and techniques. For beginners, the first step is to set the ISO appropriately, which determines the camera’s sensitivity to light. A higher ISO, typically around 1600 to 3200, will allow you to capture more details in the dark, although it can introduce noise. Experimenting within this range will help you find the balance between clarity and noise.
The next essential setting is your aperture. A wide aperture, such as f/2.8 or lower, lets in more light and is ideal for photographing the auroras. Using a fast lens can significantly improve the chances of capturing the vibrant colors. When setting the exposure time, keep in mind that longer exposures, generally between 10 to 30 seconds, are necessary to gather enough light to illuminate the scene effectively. However, if your exposure time exceeds 30 seconds, the northern lights may start to blur, so adjustments might be necessary based on the brightness of the lights.
Focus techniques are equally critical. Autofocus may struggle in low-light conditions, so manual focusing is often the best approach. Using a flashlight, you can illuminate distant objects such as rocks or trees, allowing you to set an accurate focus. After focusing on an object, switch the camera to manual focus to maintain that setting.
Finally, when composing your shots, consider the rule of thirds. Frame the auroras alongside interesting foreground elements for depth. Additionally, using a sturdy tripod will help eliminate camera shake during longer exposures. Remember that practice is key, and by understanding these settings and techniques, beginners can significantly enhance their northern lights photography experience.
Post-Processing Tips for Northern Lights Photography
Post-processing is a crucial step in northern lights photography, as it allows you to enhance the images captured during your shoot. The key is to use photo editing software effectively while maintaining the natural beauty of the auroras. Programs like Adobe Lightroom and Photoshop are widely used for this purpose, offering a multitude of tools to refine your images.
One of the first adjustments to consider is exposure. Often, photographs of the northern lights may require slight improvements in exposure levels to bring out more detail. Using the exposure slider cautiously can help brighten the image without losing the richness of dark skies. Additionally, adjusting the contrast can provide depth and dimension, making the vibrant colors of the auroras stand out against the landscape.
Color correction is another essential aspect of the post-processing phase. Northern lights can exhibit a range of colors, from greens to purples; therefore, adjusting the white balance correctly will help retain the true essence of the lights. Experimenting with the temperature and tint sliders will allow photographers to achieve a more natural color representation of the phenomenon.
Furthermore, consider sharpening the image to enhance the clarity of fine details, especially in areas where the auroras intersect with the land or water. However, be mindful of over-sharpening, which can introduce unwanted noise. Using selective sharpening, targeted solely at the auroras, can help in maintaining quality.
Once your edits are complete, it is important to prepare the images for sharing or printing. Exporting your images in appropriate formats and resolutions will ensure the quality is preserved, whether for social media platforms or physical displays. Ultimately, a good balance between enhancing and preserving the original qualities of your northern lights photography will bring out the most stunning results.
I hope this article helps those interested in capturing the Northern Lights Magic!
As an Amazon affiliate, I earn from qualifying purchases.